


Document Actions
gvSIG-Desktop 1.10. User Manual
Select the “Layer” option from the menu bar then go to “Export to…/postgis”.
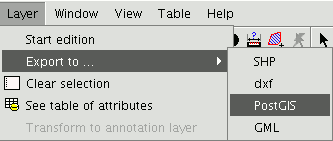
If you have selected any elements, a window will appear telling you how many elements are going to be exported (as in exporting to shp and dxf).
If you have selected any elements, a window will appear telling you how many elements are going to be exported (as in exporting to shp and dxf).
Remember that if the table already exists in the data base, the information it contains will be deleted.

Write the name of the table and click on “Ok”. A new window appears in which you will have to input the parameters of the data base connection.
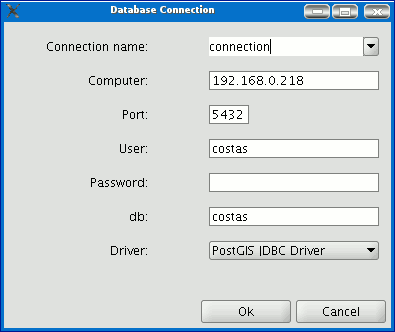
he parameters are:
Name: Name of the connection.
Computer: IP address of the computer the data base is hosted in
Port: Port on which the computer is listening to the postgreSQL service.
User: User name recognised by the administrator to make the connection
Password: User password required to validate the connection. db: The data base the new table is to be created in.
Driver: Driver required for the data base. (At the time of going to press, drivers for postGIS and mySQL were available). When you have input the connection parameters, click on “Ok”.
Cached time 11/21/13 07:10:38 


